Steinberg veröffentlicht das bereits im letzten Jahr angekündigte Cubase 12. Die DAW bekommt wie bei jedem Update einige neue Features und Verbesserungen. Zu den Highlights gehören der überarbeitete Controller-Support, VariAudio mit Skalen-Assistent, der neue Chord Assistant, FX Modulator aber auch ein neuer Limiter und ein neues Sample-Instrument für HALion.
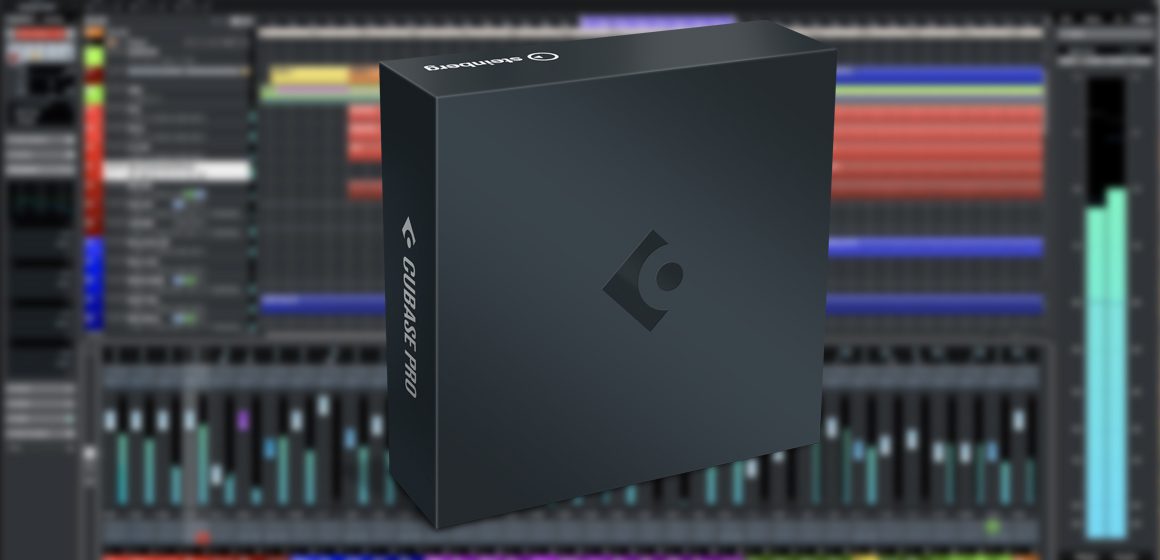
Steinberg Cubase 12
Als erstes werfen wir einen Blick auf die neuen Features, die ihr in allen drei Versionen (Pro/Artist/Elements) findet. Dazu gehört die MIDI Remote Integration. MIDI-Controller integriert ihr darüber jetzt noch einfacher in das Studio-Setup. Mit MIDI Remote Scripts erkennt Cubase Geräte automatisch und weist die Bedienelemente den Parametern zu. Eigene Skripts lassen sich mit dem MIDI-Controller-Oberflächen-Editor selbst erstellen.
Der Chord Assistant erzeugt MIDI-Akkorde aus Audiomaterial. Dafür zieht ihr einfach Audio auf eine Akkordspur, den Rest erledigt Cubase. Falls Akkorde nicht zur Tonart des Songs passen, schlägt der Assistent verschiedene Alternativen vor, die auf den nachfolgenden Akkorden basieren.
Steinberg Cubase 12
Workflow Editing wird mit neuen Funktionen und Tastaturbefehlen verbessert. Die neue Nudge-Grid-Einstellung lässt euch Musik unabhängig vom Projekt-Raster editieren. Dazu kommen frische Tastaturbefehle für das Auswahlbereich-Werkzeug.
Lautstärke-Automationen sind jetzt samplegenau und unabhängig von der Puffergröße. Außerdem gibt es mit Cubase 12 nun geglättete Wellenformzeichnungen. Wer einen Mac mit Apple Silicon benutzt, freut sich über nativen Support. Auf Windows 10 wird MIDI über Bluetooth unterstützt. Dazu kommen Performance-Optimierungen bei allen Versionen.
Neuheiten in Cubase Pro 12 und Cubase Artist 12
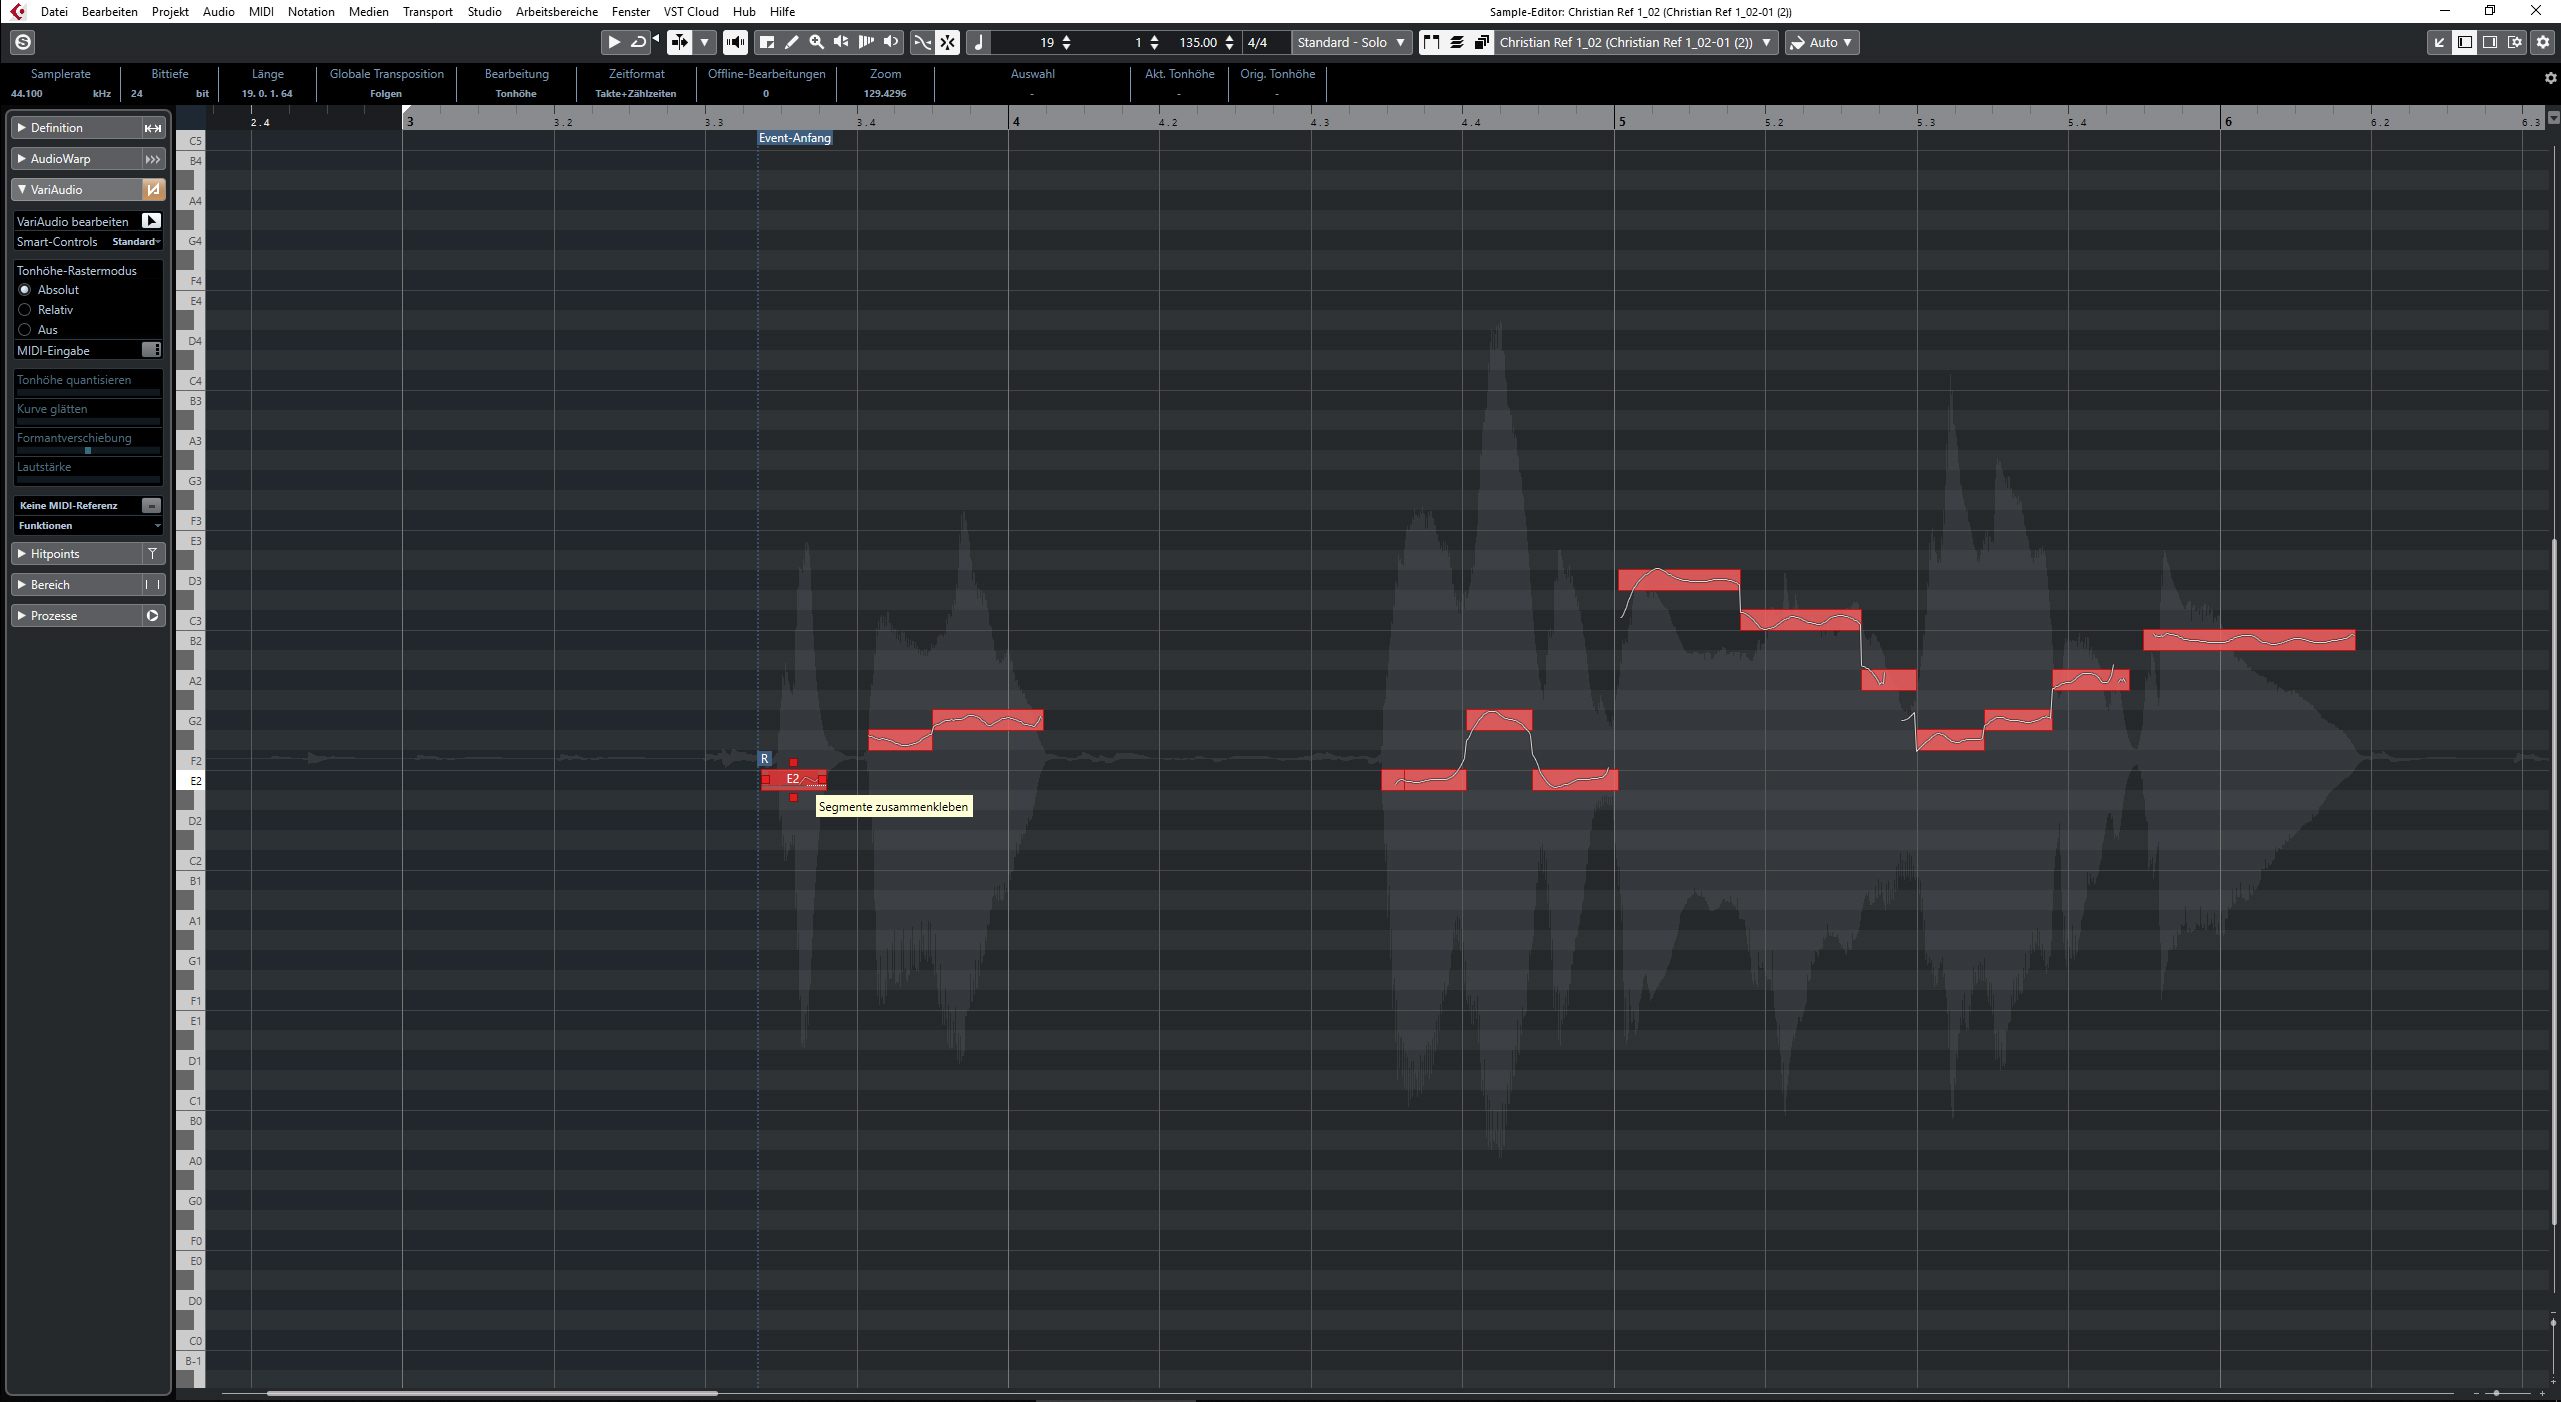
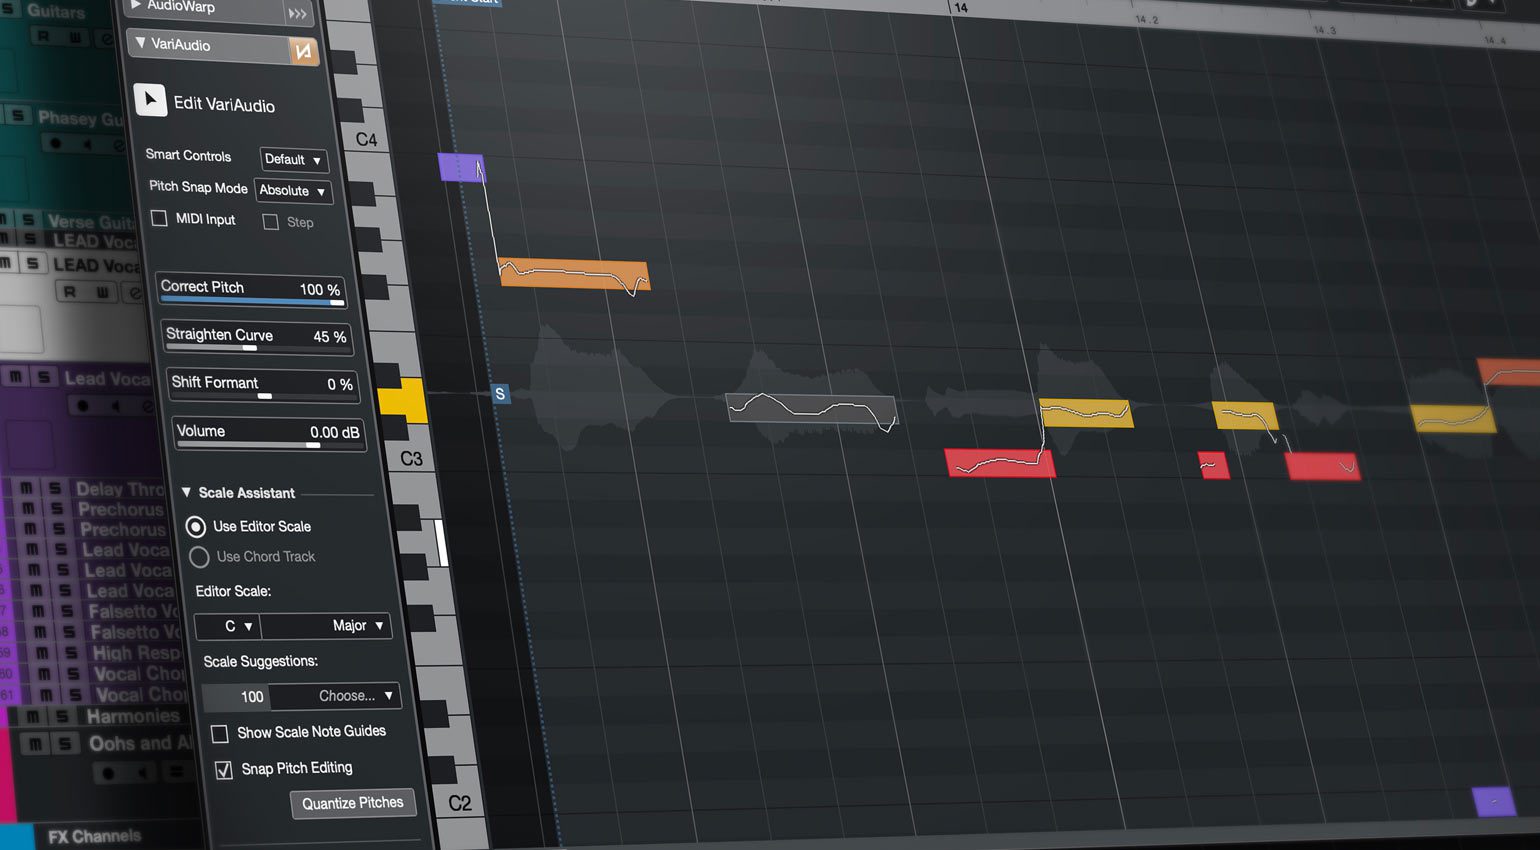
Wer die Pro- oder Artist-Version verwendet, bekommt ein paar zusätzliche Neuheiten spendiert. Das beginnt mit VariAudio und dem Skalen-Assistent. Das bringt zwei Pitch-Editing-Tools. Legt eine Skala fest und folgt der Akkordspur. Der Skalen-Assistenten schlägt eine passende Tonskala vor, die sich nach den aufgenommenen Noten richtet. So quantisiert ihr die Tonhöhe von Aufnahmem oder lasst das Pitch-Editing in VariAudio an der Skala einrasten.
Für Multieffekt-Modulationen sorgt der FX Modulator. Die Palette reicht von Ducking-Effekten bis zu Rhythmus-Patterns. Eigene LFO-Schwingungsformen erstellt ihr damit und modulieret darüber bis zu sechs Effekt-Module gleichzeitig. Der LFO lässt sich ebenso über MIDI triggern oder über mehrere Sidechain-Eingänge steuern.
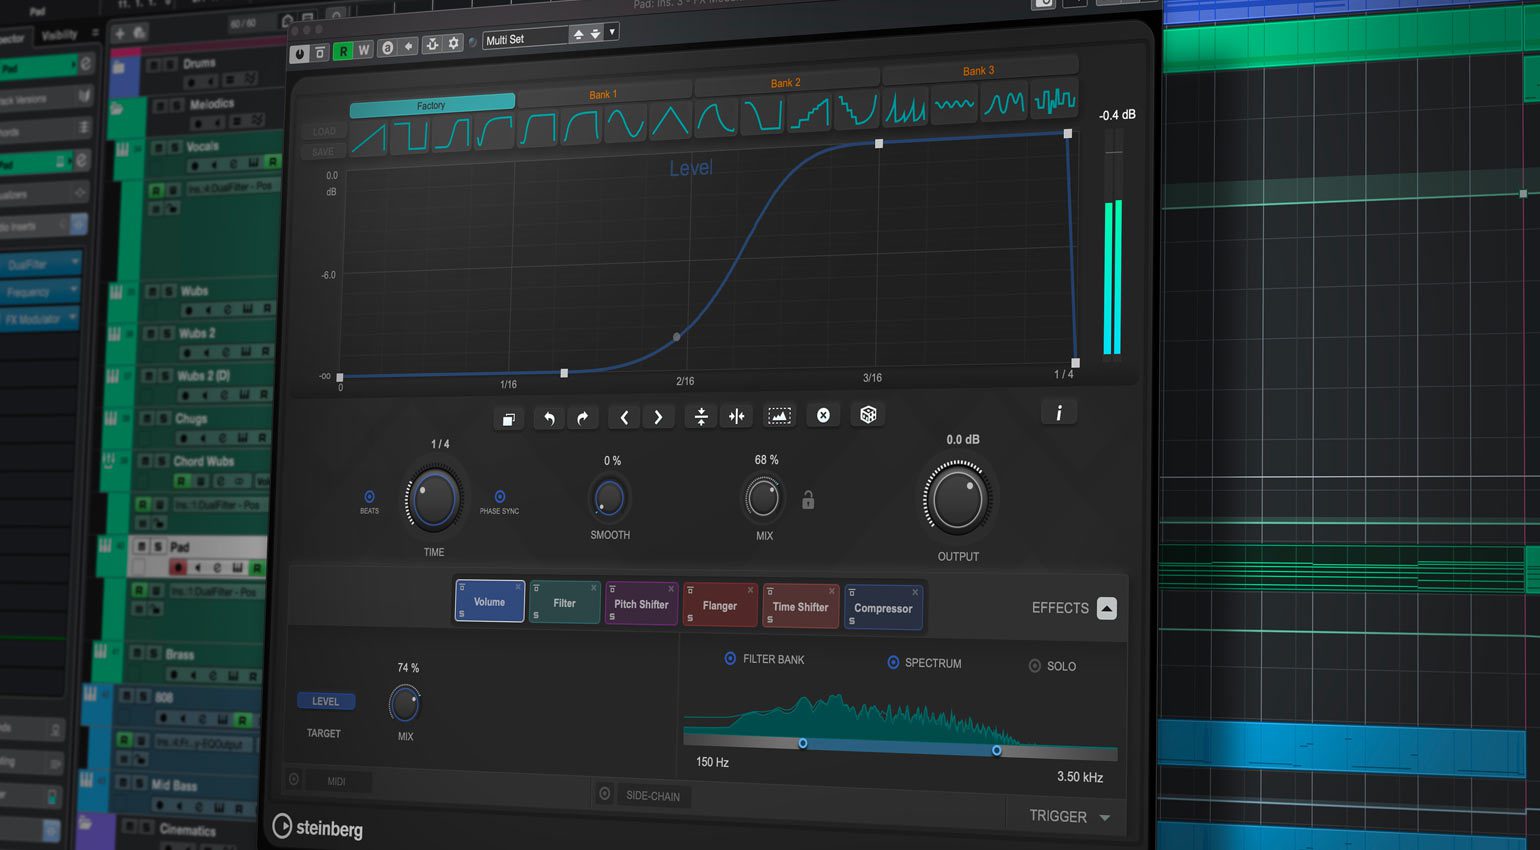
Steinberg Cubase 12 FX Modulator
Für Timing-Korrekturen gibt es Verbesserungen des AudioWarp. Das Free-Warp-Werkzeug hilft dabei, mit dem neuen phasenkohärenten AudioWarp-Modus gibt es beim gleichzeitigen Bearbeiten von mehreren Spuren keine Phasenprobleme.
Neben neuen Modulen für SupaVison verfügen die Pro- und Artist-Version auch noch über Verbesserungen für ARA. Und es gibt mit Verve ein gesampletes Filzklavier für HALion, das auch einzeln erhältlich ist.
Exklusiv in Cubase Pro 12
Raiser ist das neuste Werkzeug für Dynamikbearbeitung und verspricht „extrem schnelle Attack-Zeiten“ um damit die Loudness zu erhöhen. Raiser eignet sich Steinberg zufolge für aggressives Limiting von Drums und Gitarren, aber auch für Gesang und sogar ganzen Mixen.
Eine weitere exklusive Neuheit für Cubase Pro 12 ist der erweiterte Crossfade-Editor mit mehr Steuerungsmöglichkeiten. Audioexport bekommt Sidechain-Unterstützung, Tempo- und Taktart-Spuren lassen sich jetzt aus Projekten importieren. Und auch der Logical-Editor wurde erneuert.
Ein weiteres Extra stellt der Support für Dolby Atmos dar. Damit reagiert Steinberg auf die wachsende Popularität von Spatial Audio – allerdings wird dieses Feature erst mit einem kommenden Update nachgereicht.
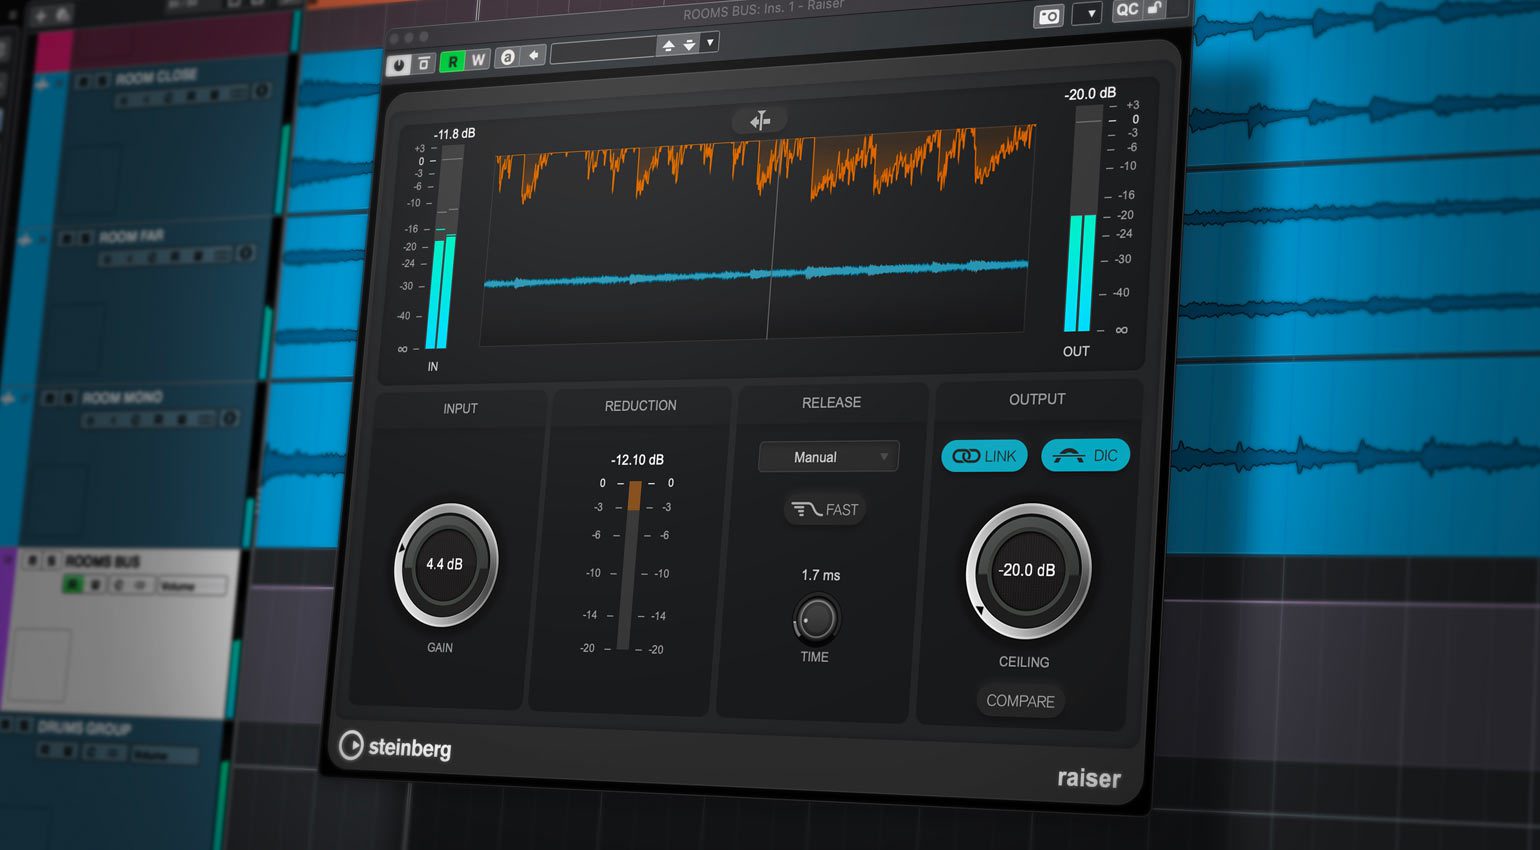
Steinberg Cubase Pro 12 Raiser
Tschüss Dongle
Der USB-eLicencer verabschiedet sich, wahrscheinlich habt ihr das schon mitbekommen. Stattdessen gibt es ein Lizenzsystem, das keinen physischen Kopierschutz mehr benötigt.
Spezifikation und Preis
Steinberg Cubase 12 läuft auf macOS (Big Sur und Montery) sowie Windows 10 oder 11.
Cubase Pro 12 kostet 579 Euro, Cubase Artist 12 gibt es für 329 Euro und Cubase Elements 12 für 99,99 Euro. Updates und Crossgrades gibt es natürlich auch, schaut dafür am besten in euren Account.
Weitere Infos über Steinberg Cubase 12
via gearnews.de
https://www.gearnews.de
https://ift.tt/ybzDmNI